

Let's dive right into the holiday spirit with a recipe that saves the day when your oven is already working overtime. I absolutely love recipes that look impressive but require zero baking time, especially during the chaotic Christmas season. These little bites are the ultimate solution when you need a festive treat but can't bear to turn on the oven. Combining creamy cheesecake, rich cocoa, and a hint of peppermint, they are perfectly portioned and undeniably delicious. Whether you are hosting a party or just craving a late-night snack, you have to try this recipe. It is quick, easy, and guaranteed to disappear from the dessert table in minutes!
Key Ingredients
One of the reasons I adore this recipe is that it relies on pantry staples and simple refrigerated items you likely already have during the holidays. It is amazing how a block of cream cheese and some crushed crackers can transform into something so elegant. You don't need any fancy equipment or hard-to-find components here, just simple, honest ingredients that come together to create a flavor explosion.
- 8 oz cream cheese, softened: The tangy and rich foundation of the cheesecake bites that must be at room temperature for smooth mixing.
- 1/2 cup powdered sugar: Provides sweetness and dissolves easily into the cream cheese to ensure a silky texture without graininess.
- 1 tsp vanilla extract: A classic flavor enhancer that adds warmth and depth to the creamy filling.
- 1 cup whipped topping (thawed): Adds lightness and airiness to the mixture so the bites aren't too dense.
- 1/2 cup crushed graham crackers: brings a necessary crunch and structure that mimics a traditional cheesecake crust.
- 1/4 cup unsweetened cocoa powder: Infuses the mixture with a deep chocolate flavor that pairs perfectly with the peppermint.
- 1/2 cup mini chocolate chips: Adds a delightful textural contrast and an extra punch of chocolate in every bite.
- 1/4 tsp peppermint extract: The star flavor that gives these bites their signature cool and festive holiday taste.
- Red and green sprinkles for decoration: Provides the essential Christmas look and a bit of crunch to the exterior.
- 1/4 cup chopped nuts (optional): An optional coating that adds a savory nutty crunch for those who want extra texture.
How To Make No-Bake Christmas Cheesecake Bites
Making these cheesecake bites is honestly therapeutic. It is all about mixing, chilling, and rolling, which makes it a fantastic activity to do with kids or while catching up on your favorite holiday movies. The process is very forgiving, but the most critical part is patience during the chilling stage. You want the mixture to be firm enough to hold its shape, so don't rush the fridge time. Once they are chilled, you get to have fun with the decorations, transforming simple brown spheres into vibrant holiday jewels.
1. In a large mixing bowl, beat the softened cream cheese with a hand mixer until it is completely smooth and creamy.
2. Gradually add the powdered sugar while continuing to mix, ensuring there are no lumps remaining in the bowl.
3. Mix in the vanilla extract and peppermint extract until they are evenly combined throughout the cream cheese base.
4. Gently fold in the whipped topping using a spatula until the mixture is light and fluffy.
5. In a separate bowl, combine the crushed graham crackers and cocoa powder and mix well.
6. Add the graham cracker mixture and mini chocolate chips to the creamy mixture, folding gently to combine all ingredients without deflating the airiness.
7. Using a small cookie scoop or your hands, form the mixture into bite-sized balls and place them onto a parchment-lined baking sheet.
8. Once all the mixture is formed into bites, pop the baking sheet into the refrigerator for about 1 hour to firm up the cheesecake bites.
9. After chilling, remove the bites from the refrigerator and roll them in the chopped nuts (if using) and then in the red and green sprinkles to give a festive touch.
10. Place the decorated cheesecake bites back on the baking sheet and refrigerate until ready to serve. Enjoy them cold!
Serving Suggestions
When it comes to serving these delightful bites, presentation is key to making them feel special. Because they are small and finger-friendly, they fit perfectly on a crowded holiday buffet table where guests can just grab one and go. I love how the red and green sprinkles pop against a white serving platter, instantly adding color to the spread. These are best served straight from the fridge to maintain that firm, creamy texture that melts in your mouth.
- Holiday Dessert Charcuterie Board: Arrange the bites alongside gingerbread cookies, candy canes, and fresh strawberries for a stunning grazing platter.
- Hot Cocoa Companion: Serve two or three bites on a small saucer next to a steaming mug of hot chocolate for the ultimate cozy night in.
- Festive Gift Boxes: Place the bites in mini cupcake liners inside a decorative tin for an adorable and edible holiday gift.
- Appetizer Skewers: Stick a festive toothpick or skewer into each bite to make them easier to pick up and eat as a mess-free party treat.
Tips For Perfect No-Bake Christmas Cheesecake Bites
I want to make sure your batch comes out absolutely perfect the first time you try it. While this recipe is labeled as beginner-friendly, a few insider tips can make the difference between a good treat and a great one. The beauty of this recipe lies in its versatility and make-ahead capability. You don't have to stress about last-minute prep because these actually taste better after the flavors have melded together in the cold. Plus, being able to tweak the coating means you can adapt them to whatever decorations you have in your pantry.
- These cheesecake bites can be stored in an airtight container in the refrigerator for up to one week.
- You can easily customize the flavors by adding crushed peppermint candies or other festive toppings.
- Perfect for holiday parties or as a sweet treat for gift-giving!
- For a gluten-free version, substitute the graham cracker crust with gluten-free crumbs.
How To Store It
Proper storage is essential for these cheesecake bites because they are dairy-based and rely on the cold to keep their shape. I have found that if you leave them out at room temperature for too long, they can get a bit too soft, so the refrigerator is your best friend here. It is always a relief knowing you have a dessert ready to go that stays fresh for days.
- Airtight Container: Place the finished bites in a sealed container to prevent them from absorbing other fridge odors.
- Parchment Layers: If you need to stack them, place a sheet of parchment paper between layers so the sprinkles don't stick to the bottom of the other bites.
- Keep it Cold: Always store them in the main part of the refrigerator, not the door, to ensure a consistent cold temperature.
- Freezing Option: For longer storage, you can freeze the uncoated balls on a baking sheet, then transfer to a bag, adding the sprinkles after thawing.
Frequently Asked Questions
I know that even with the easiest recipes, questions pop up! Here are some of the most common things people ask me about making these cheesecake bites to help you feel confident in the kitchen.
- Q: How long do the cheesecake bites need to chill before they are ready to serve?
A: You should place the formed bites into the refrigerator for about 1 hour to firm up before rolling them in the toppings. After decorating them with sprinkles and nuts, they should be returned to the refrigerator until you are ready to serve them.
- Q: How should I store these cheesecake bites and how long do they last?
A: According to the recipe notes, these bites should be stored in an airtight container in the refrigerator. They will remain fresh for up to one week.
- Q: Can I make this recipe gluten-free?
A: Yes, the recipe notes specify that for a gluten-free version, you can substitute the 1/2 cup of crushed graham crackers with gluten-free crumbs.
- Q: What is the correct way to incorporate the dry ingredients?
A: You should first mix the crushed graham crackers and unsweetened cocoa powder in a separate bowl. Then, add this mixture along with the mini chocolate chips to the wet ingredients, folding gently to combine everything.
- Q: How do I ensure the cream cheese mixture is smooth and not lumpy?
A: Step 1 instructs you to use softened cream cheese and beat it with a hand mixer until it is smooth and creamy. Step 2 further advises gradually adding the powdered sugar while continuing to mix to ensure there are no lumps.
- Q: Can I customize the toppings or flavors?
A: Yes, the recipe notes suggest you can customize the flavors by adding crushed peppermint candies or other festive toppings. While the instructions call for rolling the bites in chopped nuts and red and green sprinkles, you can easily adapt this for holiday parties or gifts.
What Makes This Special
This recipe is a total winner because it brings all the joy of a peppermint mocha cheesecake without the hassle of a water bath or cracked tops. It is effortlessly festive and practically foolproof, which is exactly what we need during the holidays. Honestly, the hardest part is not eating the mixture straight from the bowl before rolling it! I highly recommend you save this page or print the article right now so you have it ready for your next grocery run. If you make these, please leave a comment below or ask any questions you might have. I would love to hear how they turned out for you!
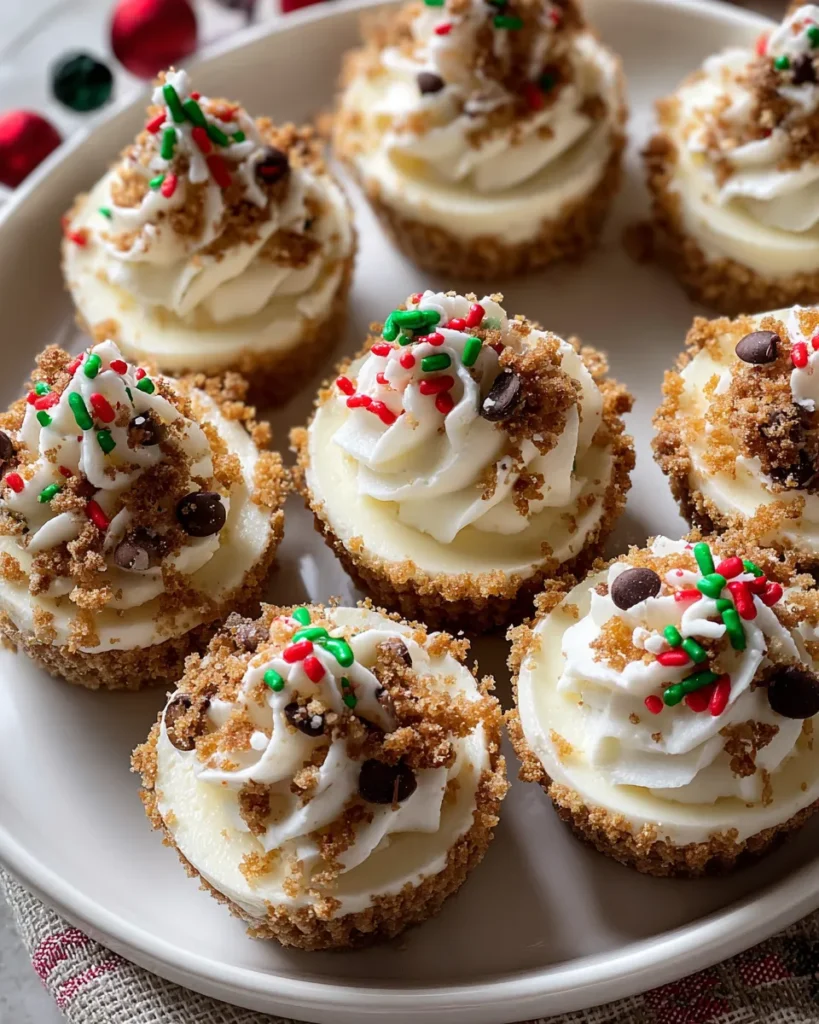

No-Bake Christmas Cheesecake Bites
Description
Creamy peppermint and rich cocoa merge with crunchy graham cracker crumbs in these chilled spheres. Rolled in festive red and green sprinkles, these effortless no-bake bites bring a cool, sweet crunch to any holiday spread.
Ingredients
Instructions
-
In a large mixing bowl, beat the softened cream cheese with a hand mixer until smooth and creamy.
-
Gradually add the powdered sugar while continuing to mix, ensuring there are no lumps.
-
Mix in the vanilla extract and peppermint extract until evenly combined.
-
Gently fold in the whipped topping until the mixture is light and fluffy.
-
In a separate bowl, combine the crushed graham crackers and cocoa powder. Mix well.
-
Add the graham cracker mixture and mini chocolate chips to the creamy mixture, folding gently to combine all ingredients.
-
Using a small cookie scoop or your hands, form the mixture into bite-sized balls and place them onto a parchment-lined baking sheet.
-
Once all the mixture is formed into bites, pop the baking sheet into the refrigerator for about 1 hour to firm up the cheesecake bites.
-
After chilling, remove the bites from the refrigerator and roll them in the chopped nuts (if using) and then in the red and green sprinkles to give a festive touch.
-
Place the decorated cheesecake bites back on the baking sheet and refrigerate until ready to serve. Enjoy them cold!
Nutrition Facts
Serving Size 24
- Amount Per Serving
- Calories 4kcal
Note
- These cheesecake bites can be stored in an airtight container in the refrigerator for up to one week.
- You can easily customize the flavors by adding crushed peppermint candies or other festive toppings.
- Perfect for holiday parties or as a sweet treat for gift-giving!
- For a gluten-free version, substitute the graham cracker crust with gluten-free crumbs.

