

No Bake Pumpkin Cheesecake Balls are the ultimate fall treat that brings together the rich, velvety texture of cheesecake with the warm, spiced goodness of pumpkin. This bite-sized dessert is a delightful mix of creamy pumpkin puree and smooth cream cheese, all enveloped in a crunchy graham cracker shell and dipped in luscious white chocolate. Whether you’re hosting a cozy autumn gathering, treating yourself after a long day, or simply craving a festive sweet bite, these easy no bake gems have got you covered. With only 30 minutes of hands-on time and zero oven antics, they’re a beginner-friendly dream come true. And did I mention each little ball clocks in at about 150 calories? That means you can indulge without guilt—well, almost!
I remember the first time I made these, I was skeptical. How could something so simple taste so decadent? But as soon as I whipped together the pumpkin puree and cream cheese with a sprinkle of pumpkin pie spice and cinnamon, I knew I was onto something special. The mixture became thick and scoopable, ready to be chilled and shaped into perfect orbs. Once dunked in melted white chocolate and rolled in crushed graham crackers, they transformed into these irresistible cheesecake truffles that literally melt in your mouth. Whether you pop them on a candy board at Thanksgiving or package them up for holiday gift baskets, they’re guaranteed to disappear in minutes. Trust me, friends, you’ll be making these again and again.
KEY INGREDIENTS IN NO BAKE PUMPKIN CHEESECAKE BALLS
Before we roll up our sleeves and dive into the step-by-step, let’s talk about the star players that make these Pumpkin Cheesecake Balls so dreamy and well-balanced.
- Pumpkin puree
Brings that classic fall flavor and creamy moisture to the cheesecake, ensuring each bite is perfectly velvety.
- Cream cheese
The cornerstone of cheesecake, it adds tangy richness and a smooth texture that holds the balls together once they’re chilled.
- Graham cracker crumbs
Acts like a binding agent and gives that unmistakable graham crust flavor, making the centers delightfully firm.
- Powdered sugar
Sweetens the filling without any gritty texture, blending seamlessly into the pumpkin-cream cheese mix.
- Vanilla extract
Lends a warm, floral backbone that complements both the pumpkin and the spice blend.
- Pumpkin pie spice
A blend of nutmeg, cloves, and ginger that instantly evokes crisp autumn days in every bite.
- Cinnamon
Enhances the spice profile with a sweet, woody warmth and rounds out the pumpkin flavor.
- White chocolate chips
Melt into a silky coating that pairs beautifully with the spiced interior and adds a decadent sweetness.
- Crushed graham crackers
For that final crunch on the outside, giving the balls a nostalgic nod to classic pumpkin pie crust.
- Salt
Just a pinch to balance the sweetness and amplify all the cozy, pumpkin-spice notes.
HOW TO MAKE NO BAKE PUMPKIN CHEESECAKE BALLS
Let’s roll up our sleeves and bring these cheesecake balls to life. You’ll breeze through the steps, and before you know it, you’ll have a batch of autumn’s cutest desserts ready to chill and thrill.
1. In a large mixing bowl, combine the softened cream cheese and pumpkin puree. Use an electric hand mixer to beat them together until the mixture is smooth and creamy, scraping down the sides occasionally to ensure everything is fully incorporated.
2. Add the powdered sugar, vanilla extract, pumpkin pie spice, cinnamon, and a pinch of salt to the bowl. Continue mixing on low speed until all the ingredients are well incorporated and the batter is silky.
3. Gradually fold in the graham cracker crumbs with a spatula, stirring until the mixture becomes thick and holds its shape when pressed.
4. Cover the bowl with plastic wrap and refrigerate for at least 2 hours. This chilling period is crucial—it firms up the mixture, making it easier to form clean balls.
5. Once the mixture is thoroughly chilled, scoop out small portions and roll them gently between your palms to create uniform, bite-sized balls. Continue until the entire mixture is used.
6. Melt the white chocolate chips in the microwave in short bursts or over a double boiler until completely smooth. Stir frequently to avoid scorching.
7. Dip each pumpkin cheesecake ball into the melted white chocolate, using a fork or dipping tool, then immediately roll it in the crushed graham crackers to coat evenly.
8. Place each coated ball on a baking sheet lined with parchment paper. Once all are coated, refrigerate for at least 30 minutes to allow the chocolate shell to set.
9. Serve the chilled Pumpkin Cheesecake Balls directly from the fridge and watch them vanish in no time!
SERVING SUGGESTIONS FOR NO BAKE PUMPKIN CHEESECAKE BALLS
When it comes to serving these adorable Pumpkin Cheesecake Balls, the possibilities are endless. Whether you’re styling a fall dessert table or looking for a simple finish to your dinner party, these ideas will elevate your presentation and delight your guests. From festive garnishes to playful pairings, here are some ways to showcase these seasonal treats with flair.
- Festive dessert platter
Arrange the cheesecake balls on a wooden or slate board, interspersed with fresh autumn leaves and small bowls of extra crushed graham crackers for an inviting fall display.
- Whipped cream dollop
Serve each ball on a mini dessert cup with a swirl of vanilla whipped cream on top, then sprinkle a pinch of pumpkin pie spice for added color and aroma.
- Beverage pairing
Complement the sweet, spiced flavors with a hot cup of spiced chai tea or pumpkin-spice latte. The warm drink accentuates the cheesecake’s spices and balances the sweetness.
- Cheesecake pops
For a playful twist, insert a lollipop stick into each ball before coating. Stand them upright in a foam block or decorative vase for a fun, party-ready dessert pop display.
HOW TO STORE NO BAKE PUMPKIN CHEESECAKE BALLS
Proper storage is key to keeping your Pumpkin Cheesecake Balls fresh, creamy, and perfectly textured. Thankfully, these little treats are quite forgiving, but a few simple guidelines will ensure they taste just as good on day two (and beyond!).
- Refrigerate in an airtight container
Layer the balls between sheets of parchment paper to prevent sticking, then seal in a container. They’ll stay fresh in the fridge for up to 5 days.
- Freeze before coating
If you want to freeze for longer storage, shape the balls first and freeze on a baking sheet until solid. Transfer them to a freezer bag, then thaw and complete the chocolate coating when you’re ready to serve. This method keeps the centers firmer.
- Keep at a consistent temperature
Avoid frequent temperature fluctuations by storing in the coolest part of the refrigerator. This helps maintain the creamy filling and crisp chocolate shell.
- Bring to serving temperature
Before enjoying chilled treats, let them sit at room temperature for 5–10 minutes. This brief rest allows the flavors to open up and the filling to soften slightly for the best mouthfeel.
CONCLUSION
I hope this journey into the world of No Bake Pumpkin Cheesecake Balls has been as fun for you to read as it was for me to write. We’ve covered everything from the silky blend of pumpkin puree and cream cheese to the satisfying crunch of graham cracker coating, all wrapped up in a sweet white chocolate shell. Whether you’re new to no bake desserts or a seasoned treat-maker, this recipe is a breeze: just 30 minutes of prep, no oven needed, and a total rest time of 2 hours and 30 minutes. Plus, with only 150 calories per ball, you can share with friends at fall parties or enjoy a little sweet snack for yourself without the guilt. Don’t forget, these are classified as a beginner-level dessert, so it’s a perfect project for novice bakers and seasoned cooks looking for something quick and delightful.
Feel free to print this article or bookmark it for your next seasonal celebration. You’ll also find a handy FAQ section below to answer those lingering questions about substitutions, storage tips, and more. If you give these cheesecake balls a whirl, please drop a comment—I’d love to hear how they turned out or if you put your own spin on the recipe. Have questions, suggestions, or simply want to share a photo of your pumpkin-spiced masterpiece? Let me know! Your feedback not only helps me but also inspires other home cooks to embrace the simple joy of no bake dessert magic. Enjoy every creamy, spiced, chocolaty bite!
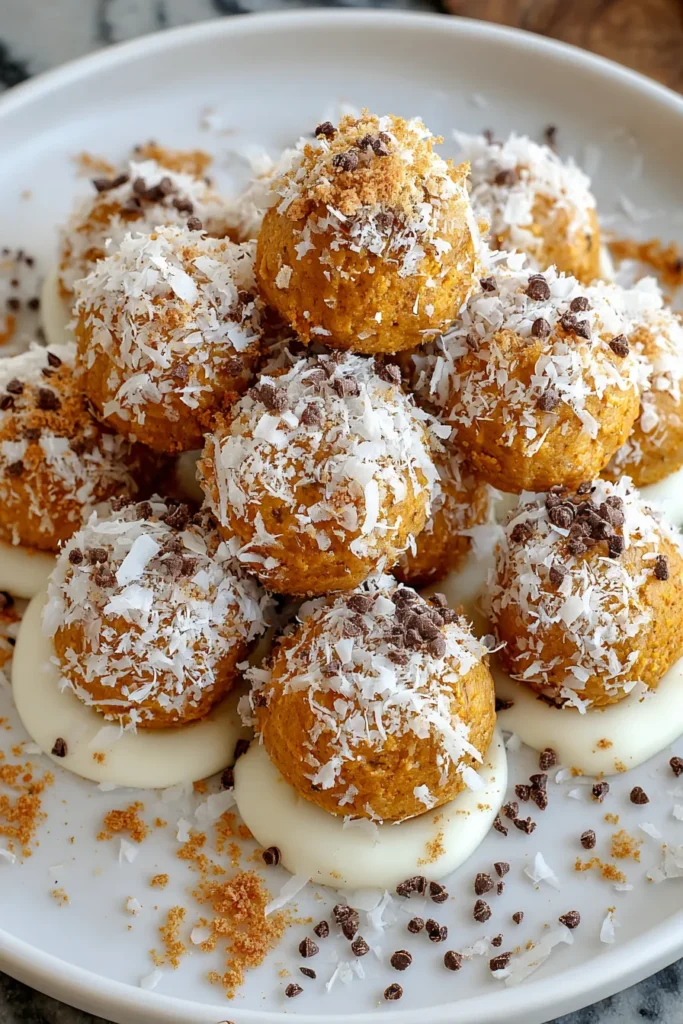

No Bake Pumpkin Cheesecake Balls
Description
These bite-sized treats are a delightful mix of creamy pumpkin cheesecake and graham cracker crunch, all coated in smooth white chocolate for a seasonal celebration.
Ingredients
Instructions
-
In a large mixing bowl, combine the softened cream cheese and pumpkin puree. Beat them together until smooth and creamy using an electric hand mixer.
-
Add the powdered sugar, vanilla extract, pumpkin pie spice, cinnamon, and a pinch of salt to the cream cheese mixture. Continue mixing until all ingredients are well incorporated.
-
Gradually add the graham cracker crumbs to the mixture. Stir until the mixture becomes thick and holds its shape.
-
Cover the bowl with plastic wrap and refrigerate for at least 2 hours to firm up the mixture, making it easier to form into balls.
-
Once chilled, take a small amount of the mixture and roll it gently between your palms to form a bite-sized ball. Repeat until all of the mixture is used.
-
Melt the white chocolate chips in the microwave or over a double boiler until smooth.
-
Dip each pumpkin cheesecake ball into the melted white chocolate, then roll it in the crushed graham crackers to coat.
-
Place each coated ball on a baking sheet lined with parchment paper. Refrigerate the balls for at least 30 minutes to allow the coating to set.
-
Serve chilled and enjoy!
Nutrition Facts
Serving Size 24
- Amount Per Serving
- Calories 5kcal
Note
- These pumpkin cheesecake balls are perfect for autumn gatherings or as a delightful holiday treat.
- Substitute the white chocolate with dark chocolate for a richer taste.
- You can freeze the balls, but do so before coating them, then thaw and coat when ready to serve.
- Add a stick to each ball to turn them into cheesecake pops for a fun presentation.

