

Ever since I baked my first Raspberry Dream Cake for a cozy family brunch, I’ve been utterly enchanted by its balance of sweet and tangy notes. This luscious cake bursting with fresh raspberry flavor is exactly what you need for celebrations or a simple midweek pick-me-up. Each forkful reveals layers of moist cake infused with vibrant raspberries, complemented by a silky buttercream that carries just the right hint of fruitiness. As you mix the batter, the kitchen fills with the promise of summer—bright, joyful, and a little bit indulgent. Whether you’re an experienced baker or tackling an intermediate dessert for the first time, this recipe guides you every step of the way, reminding you that baking is as much about heart as it is about technique.
Beyond its gorgeous appearance, the Raspberry Dream Cake is a total crowd-pleaser. It takes about 30 minutes of hands-on prep, 30 minutes in the oven, and a brief 10-minute rest before you turn it out to cool completely. Once assembled, each slice clocks in around 450 calories—perfect to share among 12 generous servings. If you’ve never worked with buttermilk or fresh fruit in a cake, don’t worry: you’ll learn how to fold berries gently so they stay intact, and how to whip up a vivid buttercream using a velvety raspberry puree. Whether you’re marking a birthday, hosting a bridal shower, or simply craving something special, this dessert elevates any moment into a memorable occasion.
KEY INGREDIENTS IN RASPBERRY DREAM CAKE
Before we tie on our aprons, let’s take a look at the stars of the show. Each ingredient plays a key role in creating that tender crumb, vibrant color, and irresistible flavor that makes this cake a dream come true. Here’s what you’ll need:
- All-purpose flour
Provides the structure and body of the cake, giving it a tender yet sturdy crumb that holds up to rich layers and frosting.
- Granulated sugar
Sweetens the batter, helps with browning, and contributes to a light, fluffy texture when creamed properly with butter.
- Unsalted butter
Adds richness and moisture to both the cake and the buttercream, creating a smooth mouthfeel and buttery flavor without excess salt.
- Buttermilk
Brings a gentle tang and extra moisture, reacting with baking soda to tenderize the crumb and keep the cake wonderfully soft.
- Large eggs
Act as a binding agent and leavening booster, adding lift and stability so the cake rises evenly without collapsing.
- Baking powder
The primary leavening agent that ensures a light, airy rise in the cake layers, creating an inviting texture.
- Baking soda
Works alongside buttermilk’s acidity to give an extra lift and prevent a dense, heavy crumb.
- Vanilla extract
Rounds out the flavor profile with warm, aromatic notes that enhance the natural sweetness of the raspberries.
- Salt
Balances sweetness and amplifies the flavors of other ingredients, making every bite taste more vibrant.
- Fresh raspberries
Provide bursts of tangy, juicy flavor and beautiful pops of color throughout the cake layers.
- Raspberry jam
Creates an extra layer of intense fruitiness between the cake and frosting, boosting raspberry flavor with a glossy finish.
- Powdered sugar
Sweetens and stabilizes the buttercream, yielding a smooth consistency that pipes and spreads effortlessly.
- Raspberry puree
Strained to remove seeds, it infuses the buttercream with a vivid pink hue and concentrated berry flavor.
- Heavy cream or milk
Adjusts the buttercream to the perfect consistency, ensuring a silky, spreadable frosting that holds its shape.
HOW TO MAKE RASPBERRY DREAM CAKE
Getting this cake just right is all about layering gentle techniques with precise timing. From whisking dry ingredients to folding in juicy berries, each step brings you closer to a show-stopping dessert that tastes as good as it looks.
1. Preheat your oven to 350°F (175°C). Grease and flour two 9-inch round cake pans to prevent sticking and ensure a smooth release.
2. In a large mixing bowl, cream together the softened butter and granulated sugar with an electric mixer until the mixture is light and fluffy, about 3–4 minutes—this aeration is key for a tender cake.
3. Beat in the eggs one at a time, mixing well after each addition so the batter stays emulsified; then stir in the vanilla extract until evenly distributed.
4. In a separate bowl, whisk together the all-purpose flour, baking powder, baking soda, and salt to evenly disperse the leavening agents.
5. Gradually add the dry ingredients to the wet ingredients in three portions, alternating with the buttermilk. Begin and end with the flour mixture, mixing on low speed just until combined—overmixing can lead to a dense cake.
6. Gently fold in the fresh raspberries with a spatula, distributing them without crushing to maintain their shape and color.
7. Divide the batter evenly between the prepared pans, smoothing the tops with a spatula for uniform layers.
8. Bake for 25–30 minutes, or until a toothpick inserted into the center of each cake comes out clean or with just a few moist crumbs attached.
9. Allow the cakes to cool in the pans for 10 minutes, then run a knife around the edges, invert onto wire racks, and remove the pans so the layers cool completely.
10. To make the raspberry buttercream, beat the softened butter in a large bowl until creamy, about 2 minutes.
11. Gradually add the powdered sugar, one cup at a time, beating well after each addition until the mixture is thick and smooth.
12. Add the raspberry puree and vanilla extract, then beat on medium speed until the color is uniform and the buttercream is fluffy. If it’s too stiff, incorporate heavy cream or milk one tablespoon at a time until you reach the desired consistency.
13. Place one cooled cake layer onto a serving plate. Spread a thin layer of raspberry jam over the top, creating a glossy fruit base.
14. Spread a generous portion of raspberry buttercream over the jam, smoothing it out with an offset spatula.
15. Carefully add the second cake layer, then frost the top and sides of the cake with the remaining buttercream, creating clean edges and an even finish.
16. Garnish with extra fresh raspberries or a light dusting of powdered sugar for an elegant final touch.
SERVING SUGGESTIONS FOR RASPBERRY DREAM CAKE
Sharing this cake is half the fun! Whether it’s a special gathering with friends or a cozy night in, plating and pairing your slices can elevate every bite. Get creative with textures, temperatures, and complementary flavors to make each serving feel like a treat. Here are a few ways I love to present this scrumptious dessert:
- Pair each slice with a dollop of vanilla bean ice cream to create a contrast between the warm or room-temperature cake and a scoop of cold creaminess that melts over the raspberries.
- Serve on a chilled cake stand to keep slices firm and add a touch of elegance—this also ensures your buttercream holds its shape for picture-perfect presentation.
- Drizzle a spoonful of homemade berry coulis around the plate for an extra pop of color and intense fruit flavor; use leftover raspberry puree sweetened with a little extra sugar and simmered until syrupy.
- Offer a selection of fresh herbs like mint or basil on the side; their bright, herbal notes cut through the sweetness and refresh the palate between bites.
HOW TO STORE RASPBERRY DREAM CAKE
Storing your cake properly ensures it stays moist, flavorful, and fresh tasting—whether you’re saving slices for later or preparing ahead for a celebration. Because this cake features fresh fruit and buttercream, a little extra care goes a long way in maintaining its delightful texture and taste. Here are my top storage tips:
- Room Temperature: If you plan to enjoy the cake within 1–2 days, keep it covered with a cake dome or large bowl on the counter. This protects it from dust and helps retain moisture without making the buttercream too firm.
- Refrigeration: For storage up to 5 days, place the cake in an airtight container or cover it tightly with plastic wrap. Insert small parchment paper layers between slices if stacking to prevent sticking. Keep refrigerated to preserve the fresh raspberry filling.
- Freezing Cake Layers: Wrap individual cake layers (without frosting) in plastic wrap, then aluminum foil, and freeze for up to 2 months. Thaw completely on the counter before applying jam and buttercream.
- Protective Buttercream Seal: Apply a thin crumb coat of buttercream around the entire cake before adding your final frosting layer. Chill for 15 minutes to set, then proceed with decoration—this seal helps lock in moisture and makes future storage easier.
CONCLUSION
Thank you for joining me on this delicious journey through every layer, swirl, and vibrant berry burst that makes the Raspberry Dream Cake an absolute show-stopper. We’ve covered everything from the foundational ingredients—flour, sugar, butter, and tangy raspberries—to the step-by-step process of creaming, folding, and frosting. You’ve also learned how to serve this beauty in style and store it properly so nothing goes to waste. Feel free to print this article and tuck it into your recipe binder or save it for later; you’ll find a handy FAQ section waiting below for any extra questions that pop up along the way.
If you give this cake a try, I’d love to hear how it turns out! Drop a comment, share your photos, or ask any questions if you need help. Whether it’s tweaking the buttercream consistency or perfecting the raspberry fold, I’m here to cheer you on. Happy baking, and may every slice of Raspberry Dream Cake bring a little extra joy to your day!
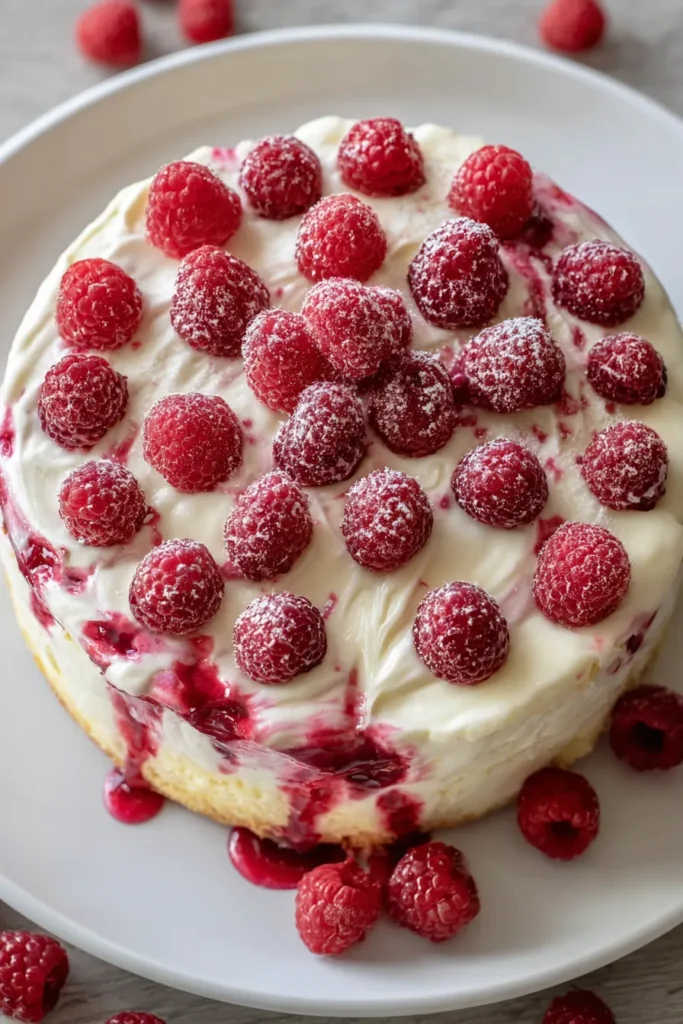

Raspberry Dream Cake
Description
This Raspberry Dream Cake features layers of moist cake infused with tangy raspberries, complemented by creamy raspberry buttercream. It's a delightful dessert that brings joy with every bite!
Ingredients
Instructions
-
Preheat your oven to 350°F (175°C). Grease and flour two 9-inch round cake pans.
-
In a large mixing bowl, cream together the softened butter and granulated sugar until light and fluffy.
-
Beat in the eggs, one at a time, mixing well after each addition. Stir in the vanilla extract.
-
In a separate bowl, whisk together the flour, baking powder, baking soda, and salt.
-
Gradually add the dry ingredients to the wet ingredients, alternating with the buttermilk, beginning and ending with the flour mixture. Mix until just combined.
-
Gently fold in the fresh raspberries.
-
Divide the batter evenly between the prepared cake pans and smooth the tops.
-
Bake in the preheated oven for 25-30 minutes, or until a toothpick inserted into the center of the cakes comes out clean.
-
Allow the cakes to cool in the pans for 10 minutes, then turn them out onto wire racks to cool completely.
-
To make the raspberry buttercream, beat the softened butter in a large bowl until creamy.
-
Gradually add the powdered sugar, one cup at a time, beating well after each addition.
-
Add the raspberry puree and vanilla extract, and beat until well combined. If the buttercream is too thick, add heavy cream or milk, one tablespoon at a time, until the desired consistency is reached.
-
Once the cakes are completely cool, place one cake layer on a serving plate. Spread a layer of raspberry jam over the top.
-
Spread a generous portion of raspberry buttercream over the raspberry jam.
-
Place the second cake layer on top and frost the top and sides of the cake with the remaining raspberry buttercream.
-
Garnish with extra raspberries or a dusting of powdered sugar if desired.
Nutrition Facts
Serving Size 12
- Amount Per Serving
- Calories 38kcal
Note
- Cake flour can be used instead of all-purpose flour for a lighter texture.
- Ensure the butter is softened to mix well and create a fluffy texture.
- The raspberry puree can be made by blending fresh raspberries and then straining the seeds.
- The cake layers can be baked and frozen ahead of time. Thaw completely before frosting.

