

There’s something utterly magical about a dessert that balances sweetness with a hint of salinity, creating a harmonious symphony on the palate. This salted caramel dessert delivers just that: a luscious, velvety caramel layer resting atop a buttery, golden-brown crust, each bite a perfect duet of flavors. Every forkful seems to melt in your mouth, revealing a creamy, rich caramel that has been patiently crafted with love and the right amount of salt to elevate its sweetness. Whether you’re celebrating a special moment or simply treating yourself after a long day, this dessert will transport you into a world of blissful delight.
In my kitchen, making this treat feels like hosting a little celebration for friends and family. The process of stirring sugar until it transforms into a deep amber liquid is almost meditative; you can practically feel the excitement building as you add butter, cream, and a pinch of salt. Then, pressing that tender crust into the tart pan, baking until it’s just the right shade of golden, and pouring the cooled caramel over it—these steps blend anticipation with pure satisfaction. Before long, the aroma of warm buttered dough and sweet caramel fills the air (yes, the aroma sneaks in despite our rule!), drawing everyone to the counter. If you’re ready for a dessert that pairs simple ingredients with big flavor and eternal comfort, let’s dive right in!
KEY INGREDIENTS IN SALTED CARAMEL DESSERT
Every great dessert starts with high-quality ingredients, and this salted caramel dessert is no exception. From the pantry staples that form the backbone of the crust to the luscious components that create the caramel layer, each item brings its unique magic. Here’s what you’ll need:
- Granulated sugar
This is the heart of the caramel, melting down and caramelizing to create that rich, golden base. Its purity ensures a smooth texture and clean sweetness.
- Salted butter
Adds a velvety richness and a hint of saltiness directly into the caramel, deepening the complexity of flavor and creating that signature sweet-and-salty contrast.
- Heavy cream
Provides the silky creaminess that transforms hardened caramel into a lush, pourable sauce. It also tempers the intense sweetness for a perfectly balanced finish.
- Salt
A pinch of this enhances the overall taste, cutting through the sweetness and highlighting the buttery and creamy notes of the caramel.
- All-purpose flour
Forms the sturdy foundation of the crust, giving structure and a tender crumb when combined with butter and sugar.
- Unsalted butter
Brings richness to the crust without altering the salt balance, ensuring the base is flaky and buttery.
- Powdered sugar
Blends smoothly into the crust dough, imparting gentle sweetness and contributing to a tender, melt-in-your-mouth texture.
- Egg yolk
Acts as a natural binder and enriches the crust with a subtle creaminess, helping everything hold together perfectly.
- Vanilla extract
Delivers warm, aromatic notes that subtly infuse both the crust and the caramel, boosting the overall flavor profile.
- Chopped pecans (optional)
Offer a crunchy contrast and nutty undertone when sprinkled on top, adding textural interest and visual appeal.
HOW TO MAKE SALTED CARAMEL DESSERT
Embarking on this recipe is like taking a mini culinary adventure—each stage builds on the last until you have an unforgettable dessert in hand. We’ll start by mastering the caramel, move on to crafting a perfect crust, and then bring it all together in a delicate balance. Follow these detailed steps for a sweet masterpiece.
1. In a medium saucepan set over medium heat, combine the granulated sugar and begin stirring constantly. Watch closely as it transforms into a golden brown liquid—this process takes patience, about 5–8 minutes, so resist the urge to crank up the heat.
2. Once the sugar has fully melted, carefully add the salted butter. The caramel will bubble vigorously, so keep a wooden spoon or heatproof spatula handy. Stir until the butter is completely melted and incorporated.
3. Slowly drizzle in the heavy cream, again taking care as the mixture will bubble up vigorously. Continue stirring and let the mixture boil for one more minute to ensure a smooth, cohesive sauce.
4. Remove the saucepan from the heat and immediately stir in the salt. This final touch brings the sweet-and-salty magic. Allow the salted caramel to cool slightly before using.
5. While the caramel rests, preheat your oven to 350°F (175°C) to get ready for the crust.
6. In a mixing bowl, combine the all-purpose flour and powdered sugar. Add the softened unsalted butter, egg yolk, and vanilla extract, then mix until a dough forms, smooth and pliable.
7. Press the dough evenly into a 9-inch tart pan, spreading it to the edges. Use a fork to prick the bottom of the crust—this prevents air bubbles during baking.
8. Place the crust in the preheated oven and bake for 15–20 minutes, or until it’s lightly golden brown around the edges. Remove from the oven and let it cool completely.
9. Once cooled, pour the cooled salted caramel over the crust, using a spatula to spread it evenly from edge to edge.
10. If you’re using nuts, chop the pecans and sprinkle them over the warm caramel layer for added crunch.
11. Transfer the tart to the refrigerator and chill for at least 1 hour. This resting time is crucial so the caramel can set firmly.
12. Finally, slice, serve, and enjoy each decadent bite of your homemade salted caramel dessert.
SERVING SUGGESTIONS FOR SALTED CARAMEL DESSERT
After all your hard work crafting this stunning sweet treat, you’ll want to present it in a way that wows everyone at the table. Whether you’re hosting a dinner party or savoring a slice on a quiet evening in, these serving ideas will elevate your salted caramel dessert to even greater heights.
- Serve each slice with a generous scoop of vanilla bean ice cream on the side. The cold, creamy texture contrasts beautifully with the rich, buttery caramel, creating a delightful harmony of temperatures and flavors.
- Drizzle an extra layer of warm salted caramel sauce over each portion just before serving. The glossy cascade adds visual intrigue and ensures every bite is decadently moist.
- Top with a light dusting of sea salt flakes to intensify the salty edge and highlight the sweetness, creating that irresistible sweet-and-salty crunch in every mouthful.
- Garnish with fresh berries—like raspberries or sliced strawberries—for a pop of color and bright, tangy notes that cut through the sweetness, adding freshness and a pretty presentation.
HOW TO STORE SALTED CARAMEL DESSERT
Once you’ve experienced how intoxicatingly good this tart is, you’ll want to keep it fresh for as long as possible. Proper storage ensures the crust maintains its tender texture and the caramel stays smooth and luscious, ready for indulgence at any moment.
- Store in the refrigerator: After covering the tart with plastic wrap or placing it in an airtight container, refrigerate promptly. This keeps the caramel firm and the crust tender. Enjoy within 3–4 days for peak flavor.
- Freeze individual slices: Wrap each piece tightly in plastic wrap and then in aluminum foil before placing in a sealed freezer bag. When you’re ready to enjoy, thaw in the refrigerator overnight for the best texture.
- Keep in the pan: If you anticipate eating within a day, simply cover the tart pan with plastic wrap and leave it in the fridge. This preserves moisture without over-chilling the crust.
- Room-temperature short-term: For serving later the same day, you can leave slices at room temperature for up to two hours. This brings the caramel to its creamiest consistency but never leave it out longer than recommended.
CONCLUSION
This salted caramel dessert captures the essence of a perfect sweet treat—rich, buttery crust meets creamy, salty-sweet caramel in a heavenly combination that’s difficult to resist. From stirring sugar patiently until it deepens into golden caramel, to pressing a tender dough into a crisp tart shell, each step is a testament to the joy of home baking. We’ve walked through the key ingredients, detailed how to create that glossy caramel sauce, and shared tips for perfect crust and chilling. Additionally, you’ve got serving ideas that add flair and storage methods to keep your masterpiece fresh.
Feel free to print out this article and keep it in your recipe binder for easy reference, or bookmark it on your device so you can revisit whenever a craving strikes. If you’re looking for more behind-the-scenes details, check out the FAQ section below. I’d love to hear how your salted caramel dessert turned out—drop a comment, share your questions, or let me know if you added your own twist. Your feedback and anecdotes always spark new kitchen adventures, and I can’t wait to hear about your sweet successes!
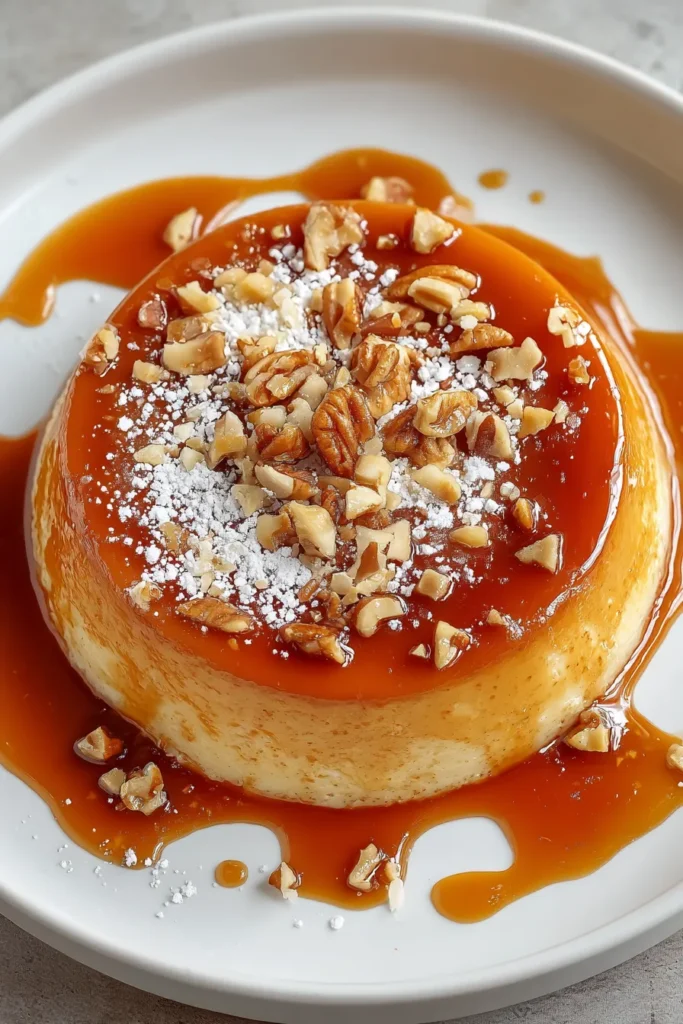

Salted Caramel Dessert
Description
This salted caramel dessert features a rich, velvety caramel layered on a buttery crust, offering a delightful combination of sweet and salty flavors that will leave you craving more.
Ingredients
Instructions
-
Begin by preparing the salted caramel. In a medium saucepan over medium heat, warm the sugar, stirring constantly until it turns a golden brown liquid. Be patient, as this process takes about 5-8 minutes.
-
Once the sugar has melted, add the salted butter to the saucepan. Be cautious, as the mixture will bubble vigorously. Stir the butter into the caramel until completely melted.
-
Slowly drizzle the heavy cream into the caramel mixture. Again, be careful as it will bubble up vigorously. Allow the mixture to boil for one more minute.
-
Remove the saucepan from heat and stir in the salt. Let the salted caramel cool slightly.
-
Preheat your oven to 350°F (175°C).
-
Prepare the crust by mixing all-purpose flour and powdered sugar in a bowl. Add the softened unsalted butter, egg yolk, and vanilla extract. Mix until a dough forms.
-
Press the dough into a 9-inch tart pan evenly. Prick the bottom of the crust with a fork to prevent bubbling.
-
Place the crust into the preheated oven and bake for 15-20 minutes or until lightly golden brown. Remove from the oven and allow it to cool.
-
Once the crust is cool, pour the cooled salted caramel on top, spreading it evenly.
-
Chop the pecans (if using) and sprinkle them over the caramel.
-
Chill the tart in the refrigerator for at least 1 hour before serving to allow the caramel to set properly.
-
Slice, serve, and enjoy your delicious homemade salted caramel dessert.
Nutrition Facts
Serving Size 8
- Amount Per Serving
- Calories 44kcal
Note
- The key to a successful caramel is patience; avoid increasing the heat to speed the process.
- This dessert can be made a day ahead and stored in the refrigerator.
- You can substitute the pecans with other nuts or omit them if you prefer a nut-free option.
- To enhance the caramel flavor, consider adding a splash of bourbon or whiskey to the caramel during step 3.

