

Halloween is a time when creativity gets as colorful as those candy bowls at the front door. The Spooky Halloween Marble Cake is the ultimate way to bring festive vibes straight to your dessert table. With its vibrant swirls of orange and black, this cake isn’t just a treat for your taste buds—it’s a visual delight that will have everyone at your party wondering if you summoned a sweet spell. The contrast between the gleaming orange pockets and deep ebony swirls makes each slice look like it belongs on a haunted mansion’s dessert stand. And beneath those ghoulish hues lies a tender, moist crumb that marries classic vanilla sweetness with a hint of rich chocolate. Every bite is like discovering a hidden treasure in a witch’s cauldron, balancing spookiness and scrumptiousness in perfect harmony.
When I first tried this recipe, I’ll admit—I was giddy like a kid at a pumpkin patch. I remember carefully piping the bold orange batter into my pan, then hesitantly adding the black swirl. It felt just like finger-painting… but edible! My kitchen turned into a laboratory of spooky science, where I tested my swirling technique and marveled at how those two colors danced together. By the time the cake emerged from the oven, I felt triumphant. That moment when you tug open the oven door and catch your first glimpse of that zebra-esque pattern—that’s pure Halloween magic. This cake not only tastes fantastic but also sparks conversations, laughs, and maybe even a few delighted shrieks from guests who can’t believe it’s homemade. It’s the kind of showstopper that makes you want to ditch store-bought options forever.
KEY INGREDIENTS IN SPOOKY HALLOWEEN MARBLE CAKE
Before we dive into the swirling of orange and black batters, let’s get to know the heroes behind this cake’s spooky charm. Each ingredient plays its part in delivering the perfect lift, flavor, and color that make this recipe shine on Halloween night.
- All-purpose flour
Provides the essential structure and body for the cake, giving it the perfect crumb that holds those marbled patterns without collapsing.
- Baking powder
Acts as the leavening agent to ensure a light and airy texture, making each slice soft and springy rather than dense.
- Salt
Enhances the overall flavor profile by balancing sweetness and rounding out the vanilla and cocoa notes.
- Unsalted butter
Contributes rich, creamy moisture and tenderizes the crumb. Using unsalted butter lets you control the exact salt levels in the batter.
- Granulated sugar
Sweetens the cake and helps create a fine, tender texture by trapping air when creamed with butter.
- Large eggs
Provide structure and stability by binding ingredients together, while adding richness and aiding in a smooth, even swirl.
- Vanilla extract
Infuses the cake with warm, aromatic undertones that complement both the vanilla and chocolate batters.
- Whole milk
Adds moisture and tenderness, ensuring your marble cake stays soft and never dries out.
- Orange and black gel food coloring
Delivers those vivid, non-runny colors that won’t compromise the batter consistency, making your marble effect pop.
- Unsweetened cocoa powder
Deepens the black batter’s color and adds a touch of chocolatey richness, rounding out the flavor contrast.
HOW TO MAKE SPOOKY HALLOWEEN MARBLE CAKE
Now that you’ve met the cast of characters, it’s time to bring them all together. These instructions guide you through each essential step, from preparing the pan to achieving that perfect marble swirl.
1. Preheat your oven to 350°F (175°C). Grease and flour a 9×13-inch cake pan to ensure the cake releases cleanly once baked.
2. In a medium bowl, whisk together the flour, baking powder, and salt until evenly distributed. Set this dry mixture aside.
3. In a large mixing bowl, beat the butter on medium speed until creamy. Gradually add the sugar and continue to beat until the mixture is light and fluffy, about 3–4 minutes.
4. Add the eggs one at a time, beating well after each addition to ensure a smooth, emulsified batter. Stir in the vanilla extract until fully incorporated.
5. Gradually add the flour mixture to the butter mixture, alternating with the milk—start and end with the flour mixture. Mix each addition just until combined, being careful not to overmix.
6. Divide the batter evenly among three bowls. Color one portion with orange gel food coloring, another with black gel food coloring, and leave the third uncolored for that classic vanilla base.
7. To make the black batter darker, add the unsweetened cocoa powder into the black-colored portion. Mix thoroughly until the color and chocolate flavor are evenly distributed.
8. Drop spoonfuls of each batter color randomly into the prepared cake pan to create that eerie marbled effect. Use a knife or skewer to gently swirl the batters together, but don’t overdo it.
9. Bake in the preheated oven for 30–35 minutes, or until a toothpick inserted into the center of the cake comes out clean.
10. Allow the cake to cool in the pan for about 10 minutes, then carefully turn it out onto a wire rack to cool completely before slicing.
SERVING SUGGESTIONS FOR SPOOKY HALLOWEEN MARBLE CAKE
Once this cake has cooled, it’s time to think about how you’ll serve and display your festive creation. Whether you’re hosting a haunted house party or just treating yourself and your family, the way you present this spooky marble cake can elevate the experience. Let your imagination roam free—after all, Halloween is about fun and flair. Here are a few suggestions to help you plate it up for maximum impact and flavor.
- Ghostly Frosting Top
Spread a smooth layer of white cream cheese or vanilla buttercream over the cooled cake, then use a toothpick to create swirling “ghost” patterns for an ethereal look.
- Candy Corn Border
Press bright candy corn pieces around the cake’s edges for a festive border. The contrast of the yellow and orange against the black swirls makes every slice pop.
- Edible Eyeball Garnish
Scatter edible candy eyeballs across the surface for a playful, spooky twist. These little details bring laughs and surprise with each bite.
- Autumn Spice Drizzle
Warm a simple glaze with a dash of cinnamon or pumpkin spice, then drizzle over the top. The spice notes add warmth and nostalgia to the chocolate-vanilla duo.
HOW TO STORE SPOOKY HALLOWEEN MARBLE CAKE
After the last slice has been savored, you might find yourself with cake leftovers craving a cozy storage solution. Properly storing your Spooky Halloween Marble Cake ensures it stays moist, tender, and bursting with color for days to come. Whether you need to tuck it away for a post-party treat or plan to freeze some for later, these tips will keep that marbled masterpiece in prime condition.
- Room Temperature Wrap
Once completely cooled, wrap the cake tightly in plastic wrap or place it in an airtight container. Store at room temperature away from direct sunlight for up to 2 days, preserving the moist crumb and vibrant colors.
- Refrigerator Storage
For up to 5 days of freshness, cover the cake with plastic wrap and place it in the fridge. Bring it back to room temperature before serving to revive the flavors and texture.
- Freezer Method
Slice the cake into individual pieces and wrap each in aluminum foil followed by plastic wrap. Store in a freezer-friendly container for up to 3 months. Thaw overnight in the refrigerator, then let stand at room temperature.
- Slice-and-Serve Prep
If you expect guests over several days, pre-slice the cake and place parchment paper between layers in an airtight container. This makes grabbing a single slice a breeze and keeps them from sticking together.
CONCLUSION
This Spooky Halloween Marble Cake has everything you need to make your October gatherings extra special: vibrant orange and black swirls, a perfectly tender crumb, and just the right balance of vanilla and chocolate flavors. From the careful selection of ingredients to the bold gel colors, every step is designed to deliver a hauntingly delicious result. Whether you’re baking for kids who love bright hues or adults who appreciate a nostalgic twist on classic marble cake, this recipe is a showstopper and conversation starter. The combination of personal flair in swirling the batters and the precision in baking ensures each cake is unique—no two slices are ever exactly the same.
Feel free to print this article and save it for your seasonal cookbook or recipe binder. You’ll also find a FAQ section below to answer any lingering questions, from troubleshooting swirl patterns to tweaking flavors. If you try this cake, please let me know how it turned out! Your feedback, comments, or questions are always welcome, and I’d love to hear about any creative twists you add. Happy baking, and here’s to a spooktacular Halloween full of flavor and fun!
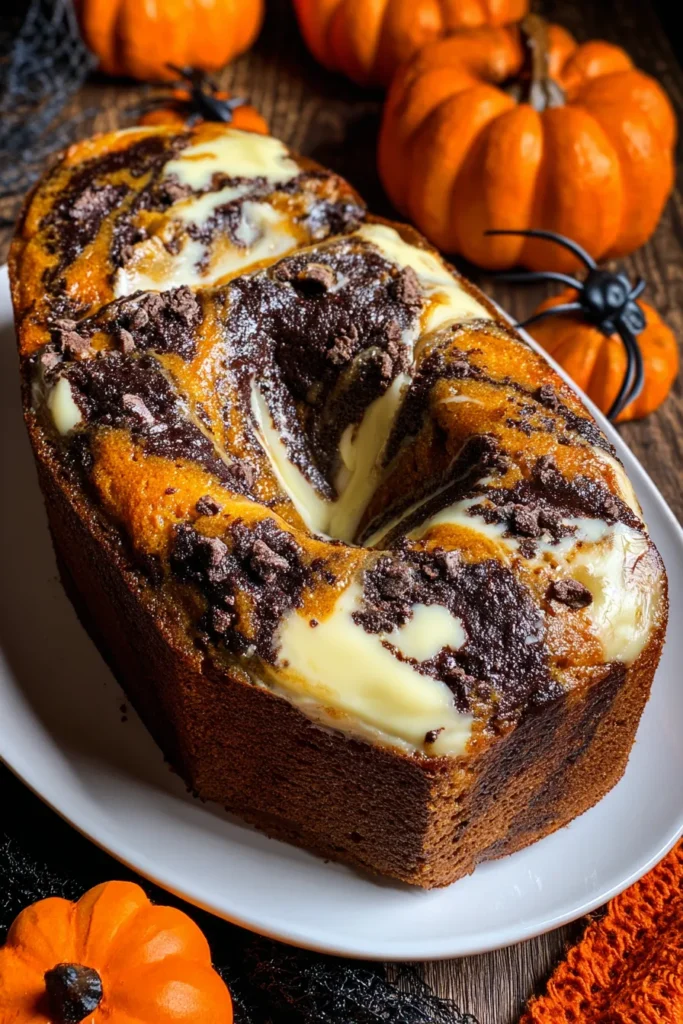

Spooky Halloween Marble Cake
Description
This vibrant marble cake combines luscious vanilla and rich chocolate flavors, artfully swirled in spooky orange and black hues. It's a Halloween delight that’s both festive and tasty!
Ingredients
Instructions
-
Preheat your oven to 350°F (175°C). Grease and flour a 9x13-inch cake pan.
-
In a medium bowl, whisk together the flour, baking powder, and salt. Set aside.
-
In a large mixing bowl, beat the butter on medium speed until creamy. Gradually add the sugar and continue to beat until light and fluffy, for about 3-4 minutes.
-
Add the eggs one at a time, beating well after each addition. Stir in the vanilla extract.
-
Gradually add the flour mixture to the butter mixture, alternating with the milk, starting and ending with the flour mixture. Mix until just combined.
-
Divide the batter evenly among three bowls. Color one portion with orange gel food coloring and another with black gel food coloring. Leave the third portion uncolored.
-
To make the black batter darker, you can add the cocoa powder into it. Mix thoroughly until the color is distributed evenly.
-
Drop spoonfuls of each batter color randomly into the prepared cake pan to create a marbled effect. Use a knife or skewer to gently swirl the batters together.
-
Bake in the preheated oven for 30-35 minutes, or until a toothpick inserted into the center of the cake comes out clean.
-
Allow the cake to cool in the pan for about 10 minutes, then turn it out onto a wire rack to cool completely.
Nutrition Facts
Serving Size 12
- Amount Per Serving
- Calories 33kcal
Note
- Use gel food coloring for more vibrant colors without altering the batter consistency.
- The cake can be frosted with a spooky-themed or your favorite frosting for a more festive touch.
- Feel free to add Halloween decorations on top like candy corn or edible eyeballs.
- Perfect for a Halloween party, this cake adds a pop of color and fun to your dessert table.

