

Fresh, crisp radishes take center stage in this sweet and spicy concoction, delivering a burst of color and flavor that will literally dance on your taste buds. Bright pink slices, marinated in a tangy apple cider vinegar bath sweetened with sugar and honey, morph into addictive little bites that balance heat and sweetness. Whether you’re a beginner looking for a quick pickle recipe or a seasoned home cook seeking a vibrant quick pickle to jazz up weeknight dinners, these pickled radishes promise to tick all the boxes: crunch, zest, and a whisper of spice.
Every forkful delivers a playful contrast—one moment you taste the crisp, peppery bite of fresh radish; the next, you sense the gentle warmth of red pepper flakes mingling with floral notes of honey. This is not your average pickled veggie. It’s a beginner-friendly, no-fuss project with just 15 minutes of hands-on prep, 10 minutes on the stove, and 24–48 hours of resting time to let those dynamic flavors truly develop. Enthusiasts of tangy toppings and appetizing sides will find these radishes irresistible atop tacos, burgers, salads, or even a charcuterie board. Each crunchy wheel brings a splash of color and a kick of flavor that elevates any dish from ordinary to extraordinary. Get ready to fall in love with pickled radishes all over again!
KEY INGREDIENTS IN SWEEET & SPICY PICKLED RADISHES
Before diving into the pickling process, let’s meet the lineup that transforms simple radishes into that perfect sweet-and-spicy bite. Every component works in harmony to create the tangy, crunchy magic you’ll soon be savoring.
- Fresh Radishes
Crisp and peppery, fresh radishes are the star of this recipe. Their natural crunch holds up beautifully in brine, giving you that satisfying snap with every mouthful.
- Apple Cider Vinegar
Bringing bright acidity and that classic tang, apple cider vinegar balances sweetness and helps preserve the color of our radish slices.
- Water
Dilutes the vinegar just enough to mellow the bite, ensuring the flavor isn’t overwhelmingly tart.
- Kosher Salt
Essential for drawing moisture out of the radishes, salt not only seasons but also helps achieve the perfect brine concentration.
- Sugar
A touch of granulated sugar rounds out the sharpness of the vinegar, contributing to that irresistible sweet edge.
- Honey
Adds a lush, floral note that elevates the overall flavor profile and deepens the sweetness in a natural way.
- Red Pepper Flakes
These flakes provide a gentle heat that lingers behind the sweetness, giving each bite an exciting kick.
- Garlic Cloves
Crushed garlic infuses the brine with savory depth, adding a subtle aromatic warmth.
- Bay Leaf
Offers a hint of herbal complexity, weaving in earthy undertones that complement the spice and sweetness.
- Mustard Seeds
When toasted in the simmering brine, mustard seeds release a mild pungency and tiny pops of texture.
- Coriander Seeds
Impart a slight citrusy warmth that brightens the brine, rounding out the flavor harmony.
HOW TO MAKE SWEEET & SPICY PICKLED RADISHES
Time to turn those bright radish rounds into tantalizing tangy bites! Follow these detailed steps to achieve perfectly pickled results.
1. Rinse the radishes thoroughly under cold water to remove any dirt. Trim off the tops and roots, then use a sharp knife or mandoline to slice them into thin rounds or your desired shapes for an even brine absorption.
2. In a medium saucepan, combine the apple cider vinegar, water, kosher salt, sugar, and honey. Stir over medium heat until the sugar and salt are fully dissolved, creating a uniform pickling liquid.
3. Add the red pepper flakes, crushed garlic cloves, bay leaf, mustard seeds, and coriander seeds to the saucepan. Bring the mixture to a gentle simmer for about 5 minutes, allowing all the spices and aromatics to meld together in the hot brine.
4. Remove the saucepan from heat and let it cool slightly, so you’re not shocking the radishes with an overly hot liquid.
5. Pack the sliced radishes into a sterilized glass jar, leaving some space at the top to accommodate the brine.
6. Pour the warm pickling liquid over the radishes, ensuring they’re completely submerged. Seal the jar tightly with a lid to lock in freshness.
7. Let the pickled radishes cool to room temperature on the counter, then transfer the jar to the refrigerator. Refrigerate for at least 24 hours to develop depth of flavor; for best results, wait a full 48 hours.
8. Serve the pickled radishes as a tangy and spicy accompaniment to sandwiches, tacos, or salads, and watch how they transform any dish into an eye-catching, flavor-packed delight.
SERVING SUGGESTIONS FOR SWEEET & SPICY PICKLED RADISHES
These pickled radishes are mini flavor bombs that can elevate almost any meal. Whether you’re aiming for a bright, crunchy contrast or a spicy-sweet accent, here are some irresistible ways to serve them:
- Taco Topping Twist
Pile pickled radish slices onto fish or chicken tacos for a burst of tang and color that cuts through rich fillings and adds a zesty crunch.
- Sandwich Booster
Layer them on deli sandwiches or grilled cheese. Their briny snap pairs beautifully with creamy spreads, melting cheese, and any cold cuts.
- Charcuterie Board Star
Scatter radish rounds around meats, cheeses, and nuts. Their vivid hue and piquant flavor provide the perfect palate cleanser between bites of robust cheeses and savory cured meats.
- Refreshing Salad Accent
Toss a handful into mixed greens or grain bowls. The sweet-and-spicy brine doubles as a light vinaigrette, instantly brightening each forkful.
HOW TO STORE SWEEET & SPICY PICKLED RADISHES
Proper storage keeps these pickled gems crunchy and bursting with flavor. Follow these tips to make your batch last and taste its best:
To maintain maximum crispness, always keep your pickled radishes fully submerged in their brine. This not only preserves texture but also protects them from air exposure, which can cause softening and flavor loss.
- Refrigerate in an Airtight Jar
Store the sealed jar in the coldest part of the fridge. Proper refrigeration keeps the pickles fresh for up to two weeks—though they rarely last that long!
- Use Sterilized Containers
Before packing, ensure your glass jars are thoroughly cleaned and sterilized. This step prevents unwanted bacterial growth and extends shelf life.
- Label with Date
Mark the jar with the day you started pickling. This helps you track the ideal 24–48 hour resting period and ensures you enjoy them before peak freshness wanes.
- Avoid Double-Dipping
Always use clean utensils when removing radishes. Introducing crumbs or moisture can speed up spoilage and impact that signature bite.
CONCLUSION
From the moment you slice those crisp radishes to the satisfying pop of heat and sweetness on your tongue, this recipe delivers a delightful dance of flavors. With minimal prep and a bit of patience—just 24 to 48 hours in the fridge—you’ll have a vibrant, tangy topping that takes tacos, sandwiches, salads, and charcuterie boards to new heights. These sweet and spicy pickled radishes embody the perfect balance of beginner-friendly simplicity and gourmet flair, offering a quick pickle recipe that’s as approachable as it is impressive. Whether you’re prepping for a casual weeknight meal or hosting friends, the recipe’s straightforward steps, colorful presentation, and versatile uses make it a must-save for any home cook’s repertoire.
Don’t let these radishes sit idle in your recipe stash—print this article, tuck it into your binder, or bookmark it for easy reference. You can revisit each section, from key ingredients to storage tips, any time you’re craving that tangy, crunchy kick. And below, you’ll even find an FAQ that answers all your burning questions on perfecting the pickle. If you give this recipe a whirl, I’d love to hear how it turned out! Drop a comment with your questions, share tweaks you made, or let me know if you need a hand mastering any steps. Happy pickling!
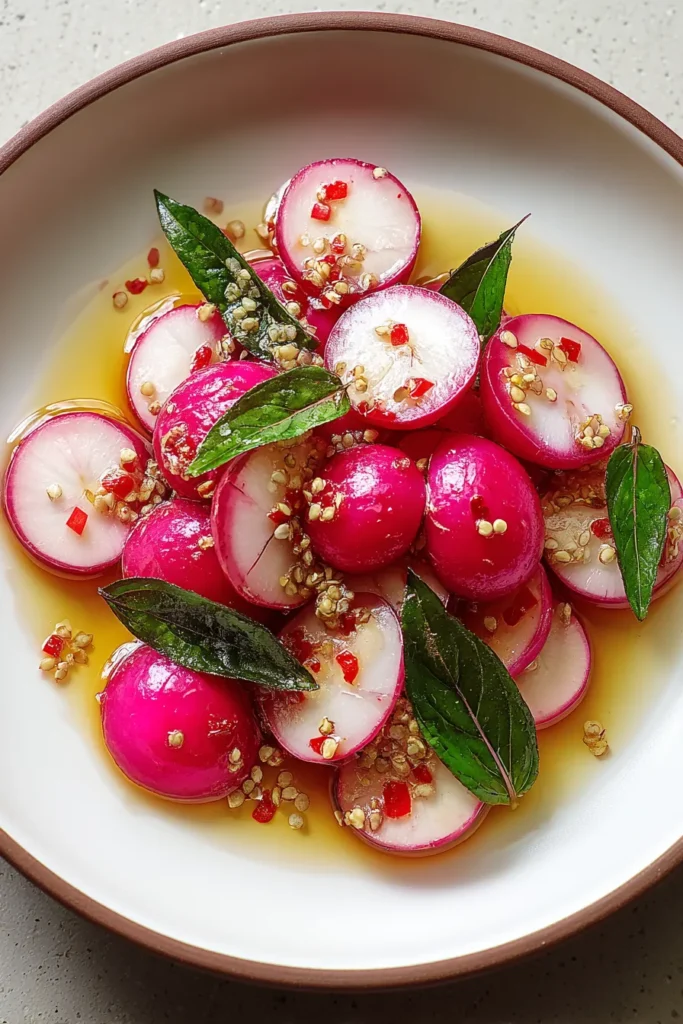

Sweeet & Spicy Pickled Radishes
Description
Experience a perfect balance of sweetness and heat with these vibrant pickled radishes. Crispy, tangy, and bursting with flavor, they elevate any dish they accompany!
Ingredients
Instructions
-
Rinse the radishes thoroughly under cold water to remove any dirt. Trim off the tops and roots, then slice them into thin rounds or desired shapes.
-
In a medium saucepan, combine the apple cider vinegar, water, kosher salt, sugar, and honey. Stir the mixture over medium heat until the sugar and salt are fully dissolved.
-
Add the red pepper flakes, crushed garlic cloves, bay leaf, mustard seeds, and coriander seeds to the saucepan. Bring the mixture to a gentle simmer for about 5 minutes to allow the flavors to meld together.
-
Remove the saucepan from heat and let it cool slightly.
-
Pack the sliced radishes into a sterilized glass jar, leaving some space at the top.
-
Pour the warm pickling liquid over the radishes, ensuring they are completely submerged. Seal the jar tightly with a lid.
-
Let the pickled radishes cool to room temperature, then refrigerate them for at least 24 hours to develop the flavors. For best taste, allow them to pickle for 48 hours.
-
Serve the pickled radishes as a tangy and spicy accompaniment to sandwiches, tacos, or salads.
Nutrition Facts
Serving Size 10
- Amount Per Serving
- Calories 3kcal
Note
- These pickled radishes will keep in the refrigerator for up to 2 weeks.
- Adjust the level of spice by varying the amount of red pepper flakes.
- For a milder flavor, consider substituting some of the radishes with other root vegetables like carrots or turnips.
- This recipe makes an excellent topping for burgers and hot dogs.
- Pickled radishes add a colorful and piquant twist to any charcuterie board.

