

Chocolate chip cookie bars are everything you love about a classic chocolate chip cookie—rich, chewy, and loaded with melty chocolate—condensed into one easy-to-cut square. With a buttery base that practically melts on your tongue and pockets of semi-sweet chocolate that ooze decadence, these bars are the kind of treat that will have friends knocking on your door. There’s something wonderfully satisfying about pulling a pan of freshly baked cookie bars from the oven, the edges crisp and the center perfectly gooey. Each bite delivers that warm, comforting hug of sweetness we all crave, making them ideal for cozy nights in or festive gatherings. Whether you’re a seasoned baker or someone who’s never cracked an egg, this beginner-friendly recipe walks you through every step, from preheating your oven at 350°F (175°C) to letting the bars rest on a wire rack for the ultimate texture.
These bars come together in about 15 minutes of prep and 30 minutes of baking, plus a 10-minute rest time—perfectly timed so you won’t be stuck in the kitchen all day. At roughly 250 calories per bar (based on 16 servings), they’re a balanced indulgence you can feel good about sharing. I still remember the first time I whipped these up on a rainy Sunday afternoon, swapping small talk for the satisfying rhythm of measuring, whisking, and folding. When my friends bit into that first square, their eyes lit up with delight—it was like serving up a little bit of homemade magic. Get ready to dive into that same joy with each chewy, chocolate-studded square!
KEY INGREDIENTS IN CHOCOLATE CHIP COOKIE BARS
Before we dive into the method, let’s chat about what makes these cookie bars so irresistible. Each ingredient plays its part in building that perfect balance of chewiness, richness, and sweet, chocolatey goodness.
- unsalted butter
Provides a rich, creamy base that contributes to the bars’ tender crumb. Melting the butter allows for easy mixing with sugars, ensuring a smooth, even texture.
- brown sugar
Adds deep, caramel-like sweetness and helps retain moisture for a chewy bite. The molasses content also gives the bars a beautiful, golden hue.
- granulated sugar
Balances the brown sugar’s moisture with its crisp sweetness, helping the edges crisp up nicely without making the center too dense.
- eggs
Act as a binder, holding all the ingredients together while adding richness. Beating them in one at a time ensures proper emulsification for a silky batter.
- vanilla extract
Infuses the bars with warm, aromatic notes that elevate the overall flavor profile. It’s the secret that turns simple sugar and flour into something magical.
- all-purpose flour
Forms the structural framework, giving the bars their shape. Measure carefully and mix just until combined to avoid overdeveloping gluten.
- baking soda
Provides gentle lift, creating just enough rise to keep the centers soft and tender without turning cakey.
- salt
Enhances all the other flavors, balancing sweetness and drawing out the richness of the butter and chocolate.
- semi-sweet chocolate chips
Are the star of the show—tiny pockets of melted chocolate that burst in every bite. Their moderate sweetness pairs perfectly with the buttery dough.
HOW TO MAKE CHOCOLATE CHIP COOKIE BARS
Ready to turn those ingredients into absolutely mouthwatering bars? Follow these detailed steps to achieve the perfect balance of crisp edges and chewy centers.
1. Preheat your oven to 350°F (175°C). Line a 9×13-inch baking pan with parchment paper or lightly grease it to ensure easy removal and perfectly intact bars.
2. In a large mixing bowl, whisk together the melted butter, brown sugar, and granulated sugar until the mixture is smooth, creamy, and fully homogenous.
3. Crack in the eggs, one at a time, beating well after each addition to create an airy texture. Stir in the vanilla extract until evenly distributed.
4. In a separate bowl, whisk together the all-purpose flour, baking soda, and salt, making sure there are no lumps.
5. Gradually add the dry ingredients to the wet ingredients, stirring just until combined. Be careful not to overmix, or the bars may become tough.
6. Fold in the chocolate chips until they’re evenly distributed throughout the dough, ensuring every square gets a generous amount of melty chocolate.
7. Spread the dough evenly into the prepared baking pan, smoothing the top with a spatula for uniform thickness.
8. Bake for 25–30 minutes, or until the top turns golden brown and a toothpick inserted into the center comes out with a few moist crumbs clinging to it.
9. Remove from the oven and allow the cookie bars to cool in the pan on a wire rack before cutting into squares. This resting period helps the bars set up perfectly.
SERVING SUGGESTIONS FOR CHOCOLATE CHIP COOKIE BARS
Once your cookie bars have cooled and you’ve cut them into neat squares, the fun really begins. These bars are incredibly versatile, and a few small touches can elevate them from a simple snack to an unforgettable dessert experience. Whether you’re hosting a casual get-together or treating yourself after a long day, here are some delightful ways to serve these rich, chewy squares.
- Pair the bars warm with a generous scoop of vanilla ice cream. Place one or two squares on a plate, top them with melting ice cream, and watch the chocolate chips soften even more for a puddle of sweet goodness.
- Serve alongside a frothy cup of coffee or cozy mug of hot chocolate. The bitterness of the coffee or the creamy sweetness of hot cocoa brings out the chocolate’s depth and the buttery richness of the bars.
- Sprinkle a pinch of flaky sea salt on top right after baking to introduce a delightful crunch and heighten the sweet-and-salty contrast. A little goes a long way in highlighting the chocolate’s complex flavors.
- Create a decadent cookie bar sandwich by layering two bars with a filling of softened peanut butter or marshmallow fluff. This playful twist makes for a fun treat at picnics, bake sales, or after-school snacks.
HOW TO STORE CHOCOLATE CHIP COOKIE BARS
After all this effort, you’ll want to keep your cookie bars tasting just as fresh as the day you baked them. Proper storage ensures that each bite remains moist, chewy, and bursting with chocolate flavor. Whether you need to prep ahead for a party or simply love having treats on hand, here are some foolproof methods.
- Room Temperature Storage: Place cooled bars in an airtight container with layers separated by parchment paper to prevent sticking. Store at room temperature for up to one week, making sure they’re kept away from direct sunlight or heat sources.
- Refrigeration: If you prefer a firmer texture or need to keep the bars longer, seal them in an airtight container or a zip-top bag and refrigerate for up to two weeks. Allow them to come to room temperature before serving for that perfect chew.
- Freezing: For long-term storage, wrap bars individually in plastic wrap, then place them in a freezer-safe bag. They’ll keep beautifully for up to three months. When you’re ready to enjoy, thaw at room temperature or warm briefly in the oven.
- Portioning for Convenience: Cut the bars into individual servings before storing. Place single portions in small containers or bags for grab-and-go snacks, lunchbox treats, or quick dessert fixes.
CONCLUSION
Bringing these rich and chewy Chocolate Chip Cookie Bars to life is a rewarding adventure, whether you’re new to baking or a seasoned pro. We’ve covered everything from the key ingredients—like unsalted butter and semi-sweet chocolate chips—to step-by-step instructions that guide you through creating that perfect balance of crisp edges and gooey centers. You’ve learned how to serve them warm with ice cream, enjoy them alongside a comforting beverage, and even store them properly to maintain their irresistible texture and flavor. With just 15 minutes of prep, 30 minutes of baking, and a brief 10-minute rest, you’ll have an effortless yet impressive dessert that’s perfect for sharing (or savoring solo).
Feel free to print this article and save it for future baking sessions, so you can whip up a batch whenever that sweet tooth calls. You can also find a FAQ below to answer any follow-up questions you might have. If you try this recipe, I’d love to hear your thoughts—did the bars turn out perfectly chewy? Did you experiment with white chocolate chips or nuts? Drop a comment with your feedback, questions, or personal twist on this classic treat. Your input and stories make this baking community feel like a warm kitchen full of friends sharing their favorite sweet moments. Happy baking!
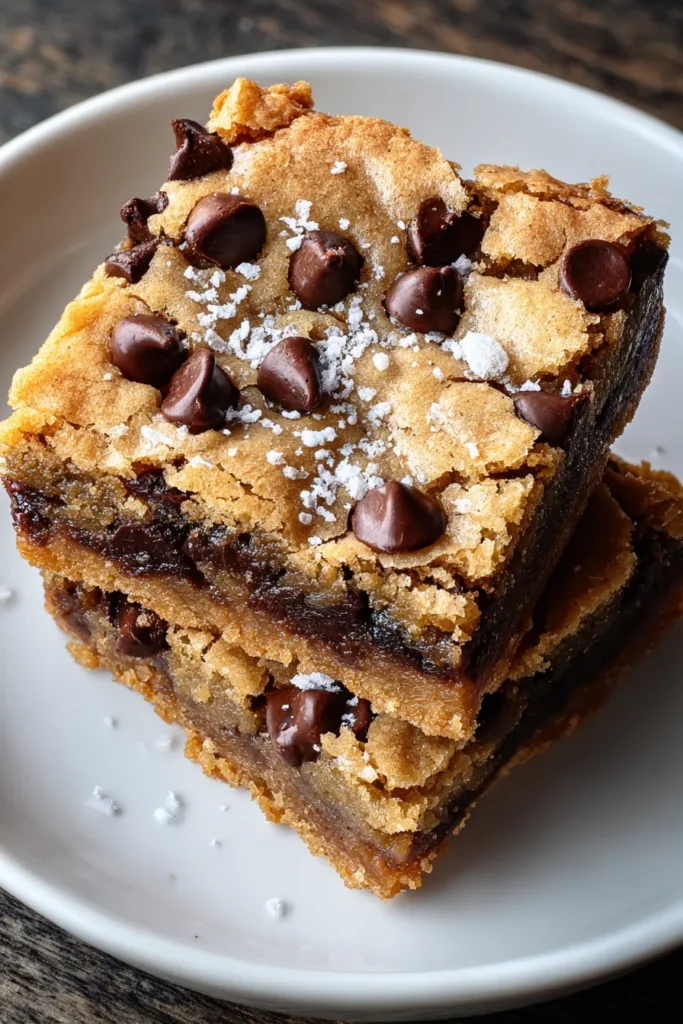

Chocolate Chip Cookie Bars
Description
Decadently sweet with a buttery base, these cookie bars are packed with melty chocolate chips, offering a delightful treat that's chewy and utterly irresistible.
Ingredients
Instructions
-
Preheat your oven to 350°F (175°C). Line a 9x13-inch baking pan with parchment paper or lightly grease it.
-
In a large mixing bowl, combine the melted butter, brown sugar, and granulated sugar. Stir until the mixture is smooth and creamy.
-
Add the eggs, one at a time, mixing well after each addition. Stir in the vanilla extract.
-
In another bowl, whisk together the all-purpose flour, baking soda, and salt.
-
Gradually add the dry ingredients to the wet ingredients, mixing until just combined. Be careful not to overmix.
-
Fold in the chocolate chips until evenly distributed throughout the dough.
-
Spread the dough evenly into the prepared baking pan.
-
Bake in the preheated oven for 25-30 minutes, or until the top is golden brown and a toothpick inserted into the center comes out with a few moist crumbs.
-
Allow the cookie bars to cool in the pan on a wire rack before cutting into squares.
Nutrition Facts
Serving Size 24
- Amount Per Serving
- Calories 8kcal
Note
- These bars can be stored in an airtight container at room temperature for up to one week.
- For an extra touch, try adding 1 cup of chopped nuts (like pecans or walnuts) to the dough.
- You can substitute the semi-sweet chocolate chips with dark, milk, or even a mix of white chocolate chips for variety.
- For a gooey texture, reduce the baking time by a couple of minutes.
- Serve warm with a scoop of vanilla ice cream for an indulgent dessert.

